Arduino + TFT TouchShield触摸板上手指南
Arduino(http://arduino.cc/)是一种基于开源的软硬件平台,包括有各种传感器,控制器,LED,马达等输入输出装置,以及Java/C++的编程接口,可以方便不懂硬件设计的人(如艺术家、设计师和爱好者)借助它来做一些原型设计。
日前开始研究手头一块Arduino Uno的板和SeeedStudio的**2.8’‘TFT TouchShield触屏。准备的步骤有:
- 从arduino上下载arduino开发环境。
- 将arduino板,TFT屏,数据线连接起来,然后接入电脑。
- 打开arduino开发环境,应该可以看到在tools->serial port下面检测到有设备(windows显示为COM,如果有多个的时候,可以到windows的设备管理其查看一下arduino设备用的是哪个COM口;mac下显示为形如“/dev/tty.usbmodem1421”这样的项)
- 到seeedstudio的**wiki上下载TFT版的开发库(TFT & TouchScreen Libraries for Arduino 1.0)。下载解压之后,里面会有两个目录TFT和TouchScreen,将其复制到Arduino的libraries目录下(mac可以复制到文稿->arduino->libraries下)。重启Arduino开发环境后,可以看到Sketch->Import Library下多了TFT和TouchScreen两个目录,同时在File->Examples下有了TFT的例子程序。
在SeeedStudio的wiki上,我们还可以看到该板的技术参数,如屏幕分辨率320x240,颜色65k(16bit),硬件细节以及API和例程。刚刚下载的开发库里面有两部分,TFT对应LCD屏的显示,TouchScreen用于读取触摸板输入。
*TFT的用法 *
下面是TFT的API汇总,主要有像素、直线、矩形、圆形以及文字的绘制。字体的size参数值可以设从1到N,最小字体(size=1)时是7x5,其后字体高度是7的倍数(14,21,28,。。)。
**Pixel **setXY(unsigned int poX, unsigned int poY) Sets the cursor position to (poX,poY). This function is internally used by other graphics APIs.
**setPixel(unsigned int poX, unsigned int poY,unsigned int color) Sets the (poX,poY) pixel to color color. This function is internally used by other graphics APIs.
**Lines **drawLine(unsigned int x0,unsigned int y0,unsigned int x1,unsigned int y1,unsigned int color) Draws a line from pixel (x0,y0) to pixel (x1,y1) with color color.
**drawVerticalLine(unsigned int poX, unsigned int poY,unsigned int length,unsigned int color) Draws a Horizontal Line of length length with color color starting from pixel (poX,poY).
**drawHorizontalLine(unsigned int poX, unsigned int poY,unsigned int length,unsigned int color) Draws a Vertical Line of length length with color color starting from pixel (poX,poY).
**Rectangle **drawRectangle(unsigned int poX, unsigned int poY, unsigned int length,unsigned int width,unsigned int color) Draws a rectangle starting from (poX,poY) of length length, width width and color color.
**fillRectangle(unsigned int poX, unsigned int poY, unsigned int length, unsigned int width, unsigned int color) Draws a filled rectangle starting from pixel (poX,poY) of length length, width width and color color.
**Circle **drawCircle(int poX, int poY, int r,unsigned int color) Draws a circle at (poX,poY) of radius radius and color color.
**fillCircle(int poX, int poY, int r,unsigned int color) Draws a filled circle at (poX,poY) of radius radius and color color.
**Text **drawChar(unsigned char ascii,unsigned int poX, unsigned int poY,unsigned int size, unsigned int fgcolor) Draws a character starting from (poX,poY) using inbuilt font of size size and with color fgcolor. This function is used by drawString() function.
**drawString(char *string,unsigned int poX, unsigned int poY,unsigned int size,unsigned int fgcolor) Draws a string of text starting from (poX,poY) using inbuilt font of size size and with color fgcolor.
在使用TFT显示的时候,要先在setup()函数对其初始化,setDisplayDirect()是用于设置显示屏的显示方向,主要针对字体而言。
Tft.init();
Tft.setDisplayDirect(UP2DOWN); 然后就可以在loop函数里面进行绘制了。下面是TFT.h里定义的一些常量,可以在代码中使用。
**Color
**Screen Resolution
RED 0xf800 MIN_X 0
GREEN 0x07e0 MIN_Y 0
BLUE 0x001f MAX_X 240
BLACK 0x0000 MAX_Y 320
YELLOW 0xffe0
WHITE 0xffff **Display Direction
CYAN 0x07ff LEFT2RIGHT 0
BRIGHT_RED 0xf810 DOWN2UP 1
GRAY1 0x8410 RIGHT2LEFT 2
GRAY2 0x4208 UP2DOWN 3
*TouchScreen的用法
TouchScreen的原理是通过压感检测到用户在触摸板上的点击位置,在串口上把数据传回来。为了对压感检测的精确性,开发工程师在例程上已经设好了相应的参数,我们可以直接用其进行初始化:
TouchScreen ts = TouchScreen(XP, YP, XM, YM, 100);
同时,我们还要初始化串口的通信,因为我们写的程序会录制进arduino的单片机上,然后它在运行的时候会把信息通过串口发回来给我们。这一系列的操作都是通过Serial库来进行的。
void setup(void) {
Serial.begin(9600);
// …
}
获取触点位置的信息:
// a point object holds x y and z coordinates
Point p = ts.getPoint();
if (p.z > ts.pressureThreshhold) { // when the point is above pressureThreshhold
Serial.print(“Raw X = “); Serial.print(p.x); // print info through Serial Port
Serial.print(“\tRaw Y = “); Serial.print(p.y);
Serial.print(“\tPressure = “); Serial.println(p.z);
}
p.x = map(p.x, TS_MINX, TS_MAXX, 240, 0);
p.y = map(p.y, TS_MINY, TS_MAXY, 320, 0);
在程序运行时,我们可以通过打开串口监视器(Serial Monitor)来监测arduino发回来给我们的信息:
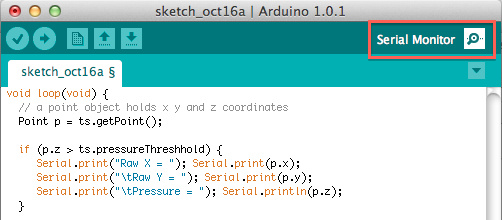
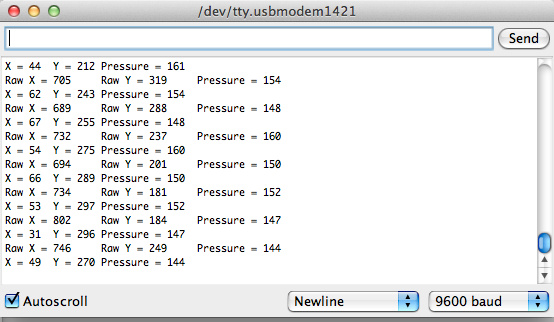
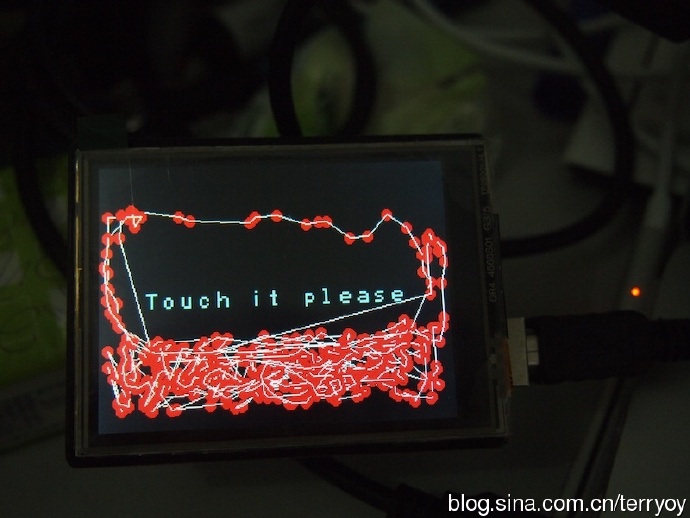
画图的部分不详细解释了,有兴趣可以看源代码,逻辑很简单。注意底部有一个delay()的函数,如果设得比较大的话,屏幕取点的时间间隔就会比较大,这样感觉起来触屏不是很灵敏,因此我在测试时设一个相对小的值,就可以较好地反应出手指划过的轨迹。
**演示程序源代码
演示效果:
分享: